

Our home turns 40 this year. It’s not a vintage treasure with unique craftsmanship and intricate detail. It’s not a modern beauty with vaulted ceilings and contemporary design. No, it’s a basic tract home, built in the golden era of,… 1979. It’s nothing special.
There’s no reason for it to stay that way. We’re hell-bent on making it special and aging in place. Fresh from a (mostly-done) kitchen remodel. We’ve turned to the adjoining dining room. The room is a spectacular example of basic builder’s grade floor molding, taupe walls, and a soaring 7’ 10½” ceiling.

Yeah. Pumpkins. This is from a few months ago.
Ready for a Monster Post? Get comfortable friends. Rather than serialize this project over the multiple weekend days I worked on it, I opted for a single mega post. Thus you will note the many changes in t-shirt collection as I picked away at the project, a few hours here and there.
Previously on AZ DIY Guy…
I’d started the room by trimming two of the doorways in a craftsman style, hiding the banged up drywall corners and giving the room the early beginnings of some actual character. I tore out the crummy base molding and replaced it with a beefy 1 x 6. On top of this base, I’d create the a tall, board and batten wainscoting to dress the room up.
You see me using my beloved cordless nailer throughout this project but it can be done easily with a pneumatic nailer or even <gasp!> a hammer and nails. There’s many ways to do this project with a wide variety of tools.

It’s all about the base.
The “Boards” - Smoothing textured walls
Most homes around here don’t have smooth, plaster finished walls, but a have a knockdown or orange peel texture.
It wouldn’t look good for wainscoting background. The wall covering is supposed to look like smooth panels. I considered a couple options:
Option 1: Skim Coating
I thought about skim coating the lower section of the wall to make it ultra smooth. I’d read a great skim coating tutorial a while back by one of my blogging buddies, Sara of Ugly Duckling House. I was sure I could do it with her excellent instructions.
I considered just how much time and mess I’d have to go through while I did the project on my (weekend-only) DIY schedule. In the end, I figured the spatter and dust I’d create smack-dab in the middle of the house while doing our day-to-day living would be too much, especially so soon after the year-long kitchen remodel.
Option 2: Cover it up
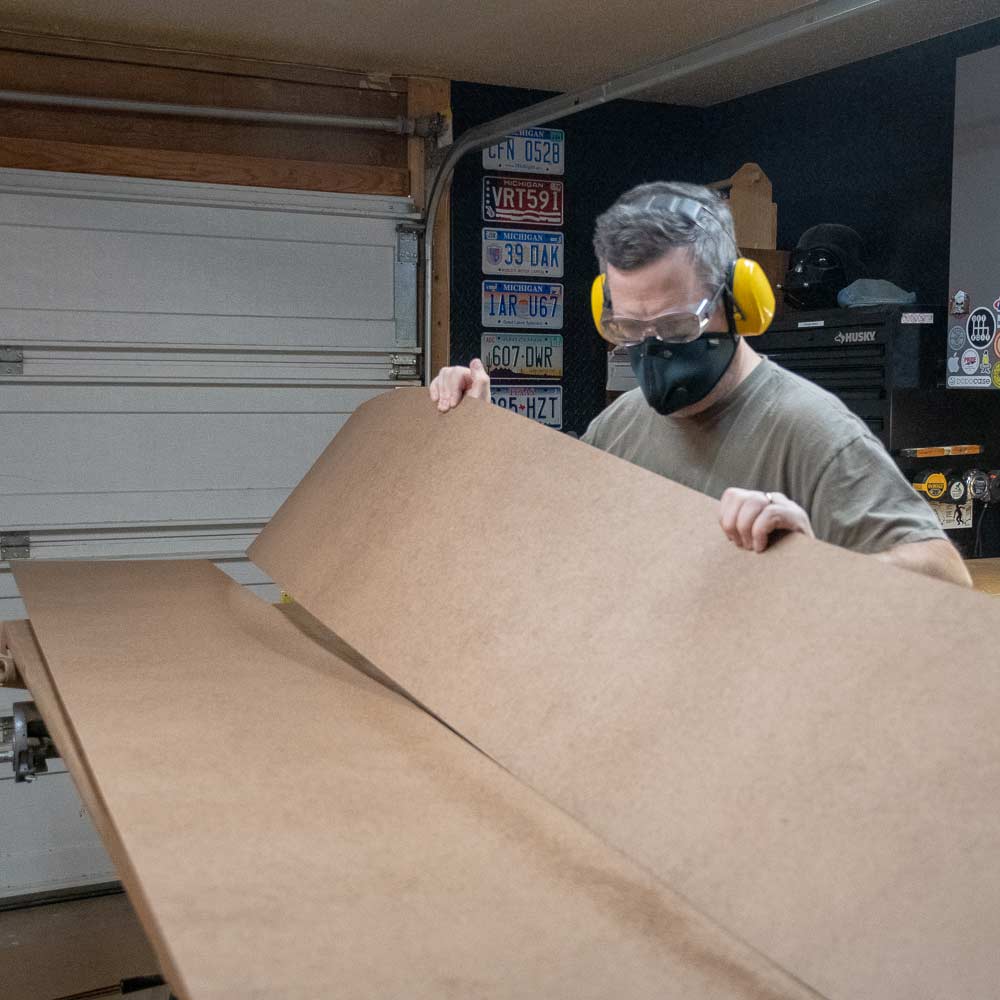
I chose to cover the wall with thin sheets of super-smooth, thin hardboard (High Density Fiberboard (HDF)). If I used full 4’ x 8’ sheets along the wall, I’d have to cut them to join directly behind a vertical trim piece. Instead, I chose to cut equal panels, barely wider than I needed to span all of the spaces. Doing so would save the purchase of two, full sheets.
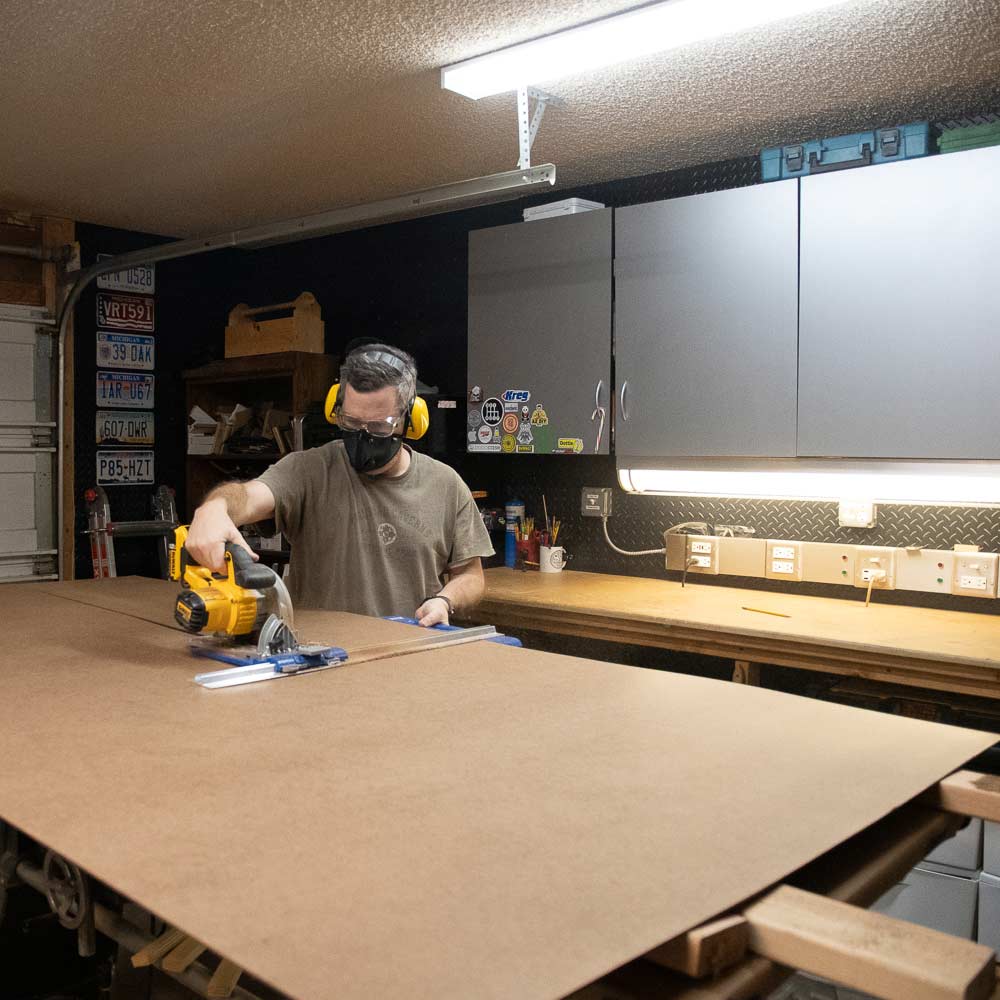
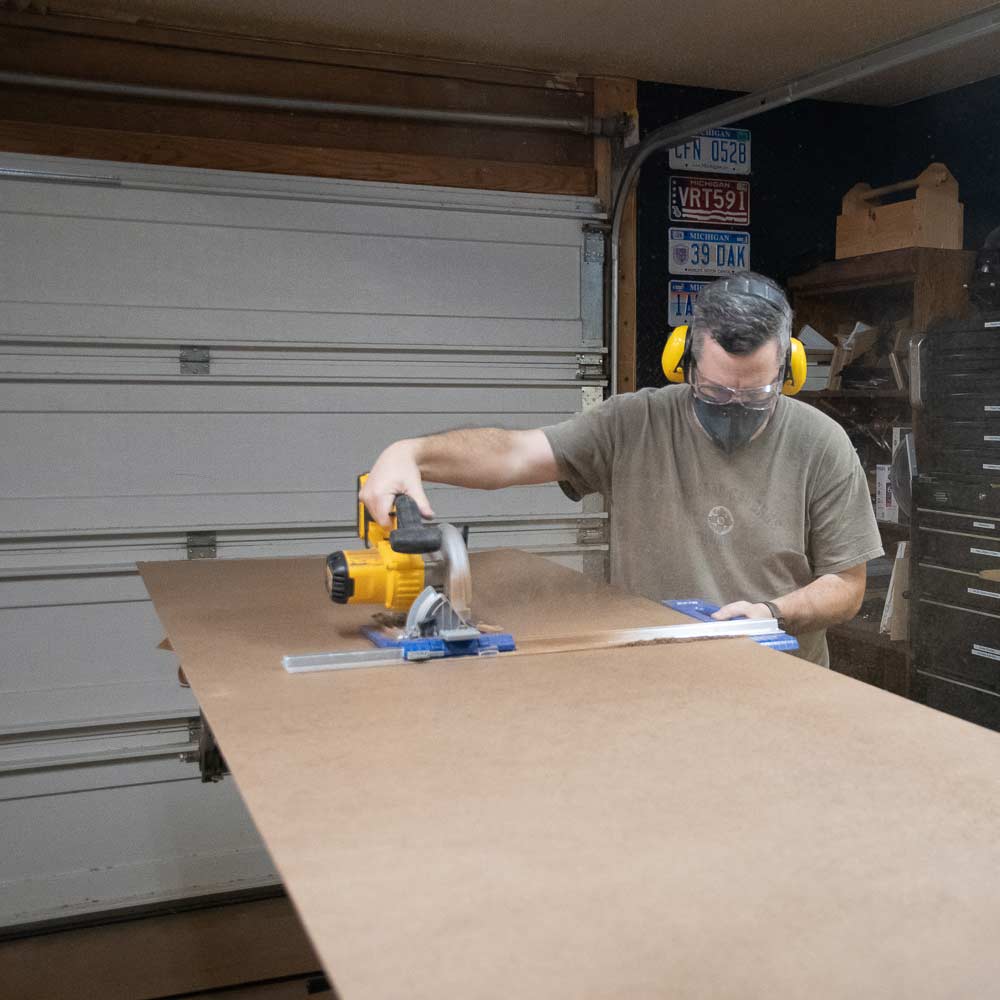
I returned from my wood shopping trip (both of my local home centers stock the stuff) and popped a sheet up on some 2 x 4’s atop my improvised work table.

Man-handling a 4x8 sheet of 1/8” hardboard
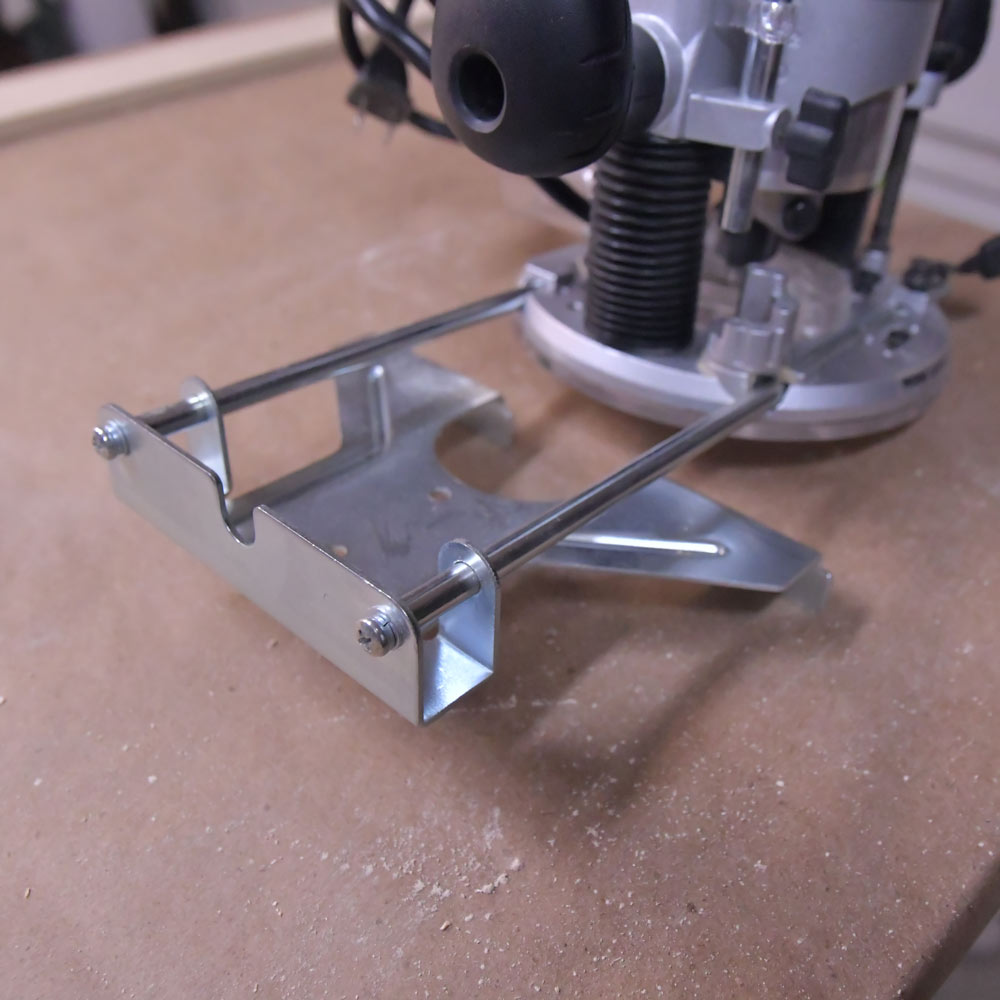
Rather than feeding the unwieldy sheet through the table saw or eyeball the cut, I had a handy jig. To rip it into perfectly equal-sized panels, I hooked my new Kreg Accu-Rip onto my circular saw. This oversize edge guide is far easier to handle than the wimpy, little guides that come packaged with some saws.

Attaching the Kreg KMA2685 Circular Saw Guide
I sliced my way through all the sheets, one after the other. The hardboard is an engineered wood product made from compressed wood fiber and who knows what else. It generates an absolute ton of sawdust. Good respiratory protection is a must.
BUILDING the “battens”
“Battens” are the narrow strips that divide the wall treatment into segments. There are so many ways to make and install them, from narrow spaced verticals, to a square pattern, or a combination of the two. They can be done with intricate edges and fine trim lines to simple and blocky. In keeping with the craftsman theme I’ve been doing around the house, I’m going for simple, vertical dividers.
Although, off-the-shelf boards would work great, the expense is unnecessary. This is a decorative project, not structural. I chose to make the vertical battens our of MDF (Medium Density Fiberboard). It worked well because wanted something thinner than the 3/4” base molding to give more contrast in the depth of all the pieces. A 5/8” thick, 4x8 sheet would give me enough material to do the whole project.
I set the Kreg Accu-Cut to 2 1/2” and merrily ripped the entire sheet into strips.
Both the MDF and the hardboard are sawdust fiber products, but MDF makes hardboard look like a sissy when it comes to the fine art of extreme sawdust creation. It’s an absolute dust storm. I turned on a floor fan and opened the garage door (Phoenix in wintertime!!!).
I still made a big, damn mess in the garage. I should have set up the dust collector. This is definitely best not done inside the house.
I spent 45 minutes sweeping, vacuuming, and blowing the garage out. I was left with a beautiful pile of boards and battens, stacked and waiting for action.

The board and batten DIY special
Installing Board and Batten Wainscoting
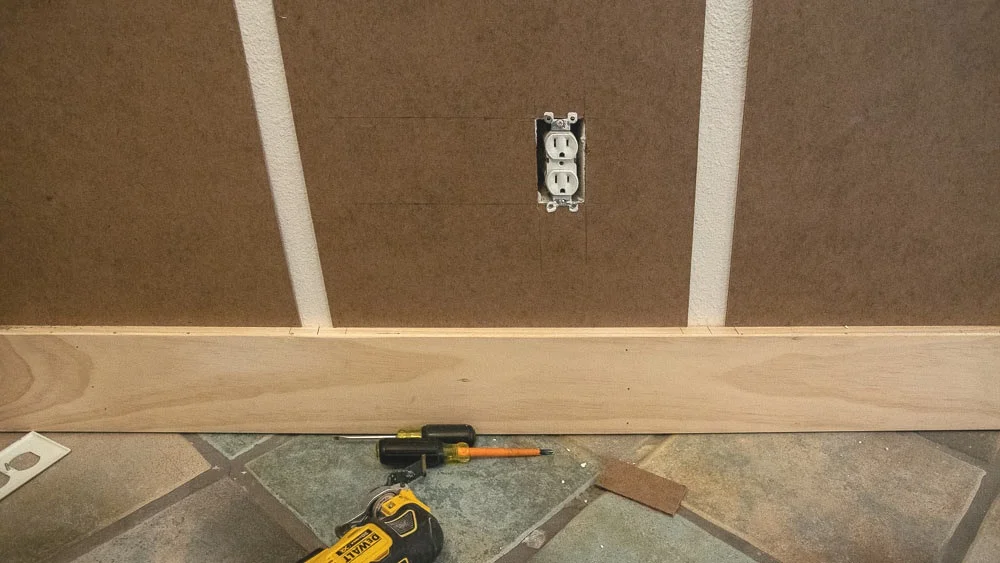
The boards can (and probably should) be attached to the wall with construction adhesive, but I chose not to. I decided that I’d make it easier for myself or a future owner to remove this without catastrophic damage to the drywall. I used fasteners instead.
In the case of the 1/8” hardboard, a finishing nail would blow right through. Even if I dialed the nail gun power down and set the depth properly, there just wouldn’t be enough holding power with a tiny-headed finishing nail. Instead, I brought my old pneumatic stapler in and trailed the air hose all the way back to my workbench. I shot staples around the edges of the boards.

Poppity-pop! I nailed all the easy ones into place first, the ones without cutouts for electrical outlets. The staples around the edges would be covered by the battens or hidden behind caulk, but I still had to shoot a couple into the middle of each board to tighten them up a bit. (If I did this again, I think I’d use the adhesive for the boards)

The receptacle holes can be done with a drilled hole and a jigsaw or similar, but I used the oscillating multi-tool which I never seem to stop finding uses for. I’m going to replace the outlets with clean, decorator style ones later, but for now I’ll leave the old crusties in place. For not, I can paint right over them and not even care. I’m kind of a bad-ass like that.
Cut with oscillating multi-tool ease
I’d let the backing boards extend beyond the height of the battens. It would help press them into place and hide the staples when I installed the horizontal header board.

I’d trim that one some more.
I lined the MDF battens up with marks on the base molding, leveled, and nailed them in. I alternated the angles of each nail I shot so it would grab the drywall behind. I figured that shooting the nails straight would make them more susceptible to vibrating loose and pulling out over time. I gave each one a healthy tug; they weren’t going anywhere.

Angled nailing to grab the drywall behind
The project was already shaping up at this point. In the small room, the vertical lines were already giving the illusion of more height. They could be fancied up with a thin, bead molding of some sort wrapping around each of the rectangles, but I wanted to keep it simple, more in line with the craftsman style.

Building the Plate Rail
Even if I was only doing the board and baton, I’d still top it off with a horizontal cap piece. If it was lower height wainscoting, I’d probably add a piece chair rail molding as well. Those would be purely decorative, and I’d probably just angle nail them into the drywall. However, since I’d be adding a plate rail / shelf on top of my design that would carry some weight, it needed to be secured well. I needed to tie it to actual structure.
I used my stud finder to locate the framing in the walls so I’d be sure to hit something sturdy with the nails. I installed clean, pine 1 x 4’s (¾” x 3 ½” actual) for the cap. 10 foot long boards only needed a slight trim to fit our room.

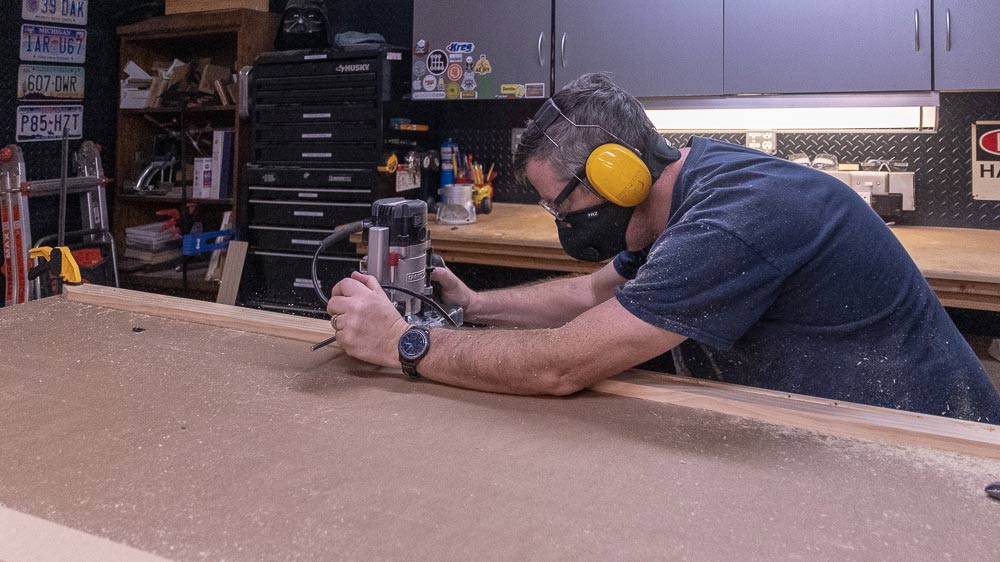
Plate rails have a groove or channel cut into the top to keep flat stuff like plates and picture frames from slipping off and crashing to the floor. They can be created with several passes with a table saw or circular saw, but I chose to cut mine with a ½” V-groove bit in my router.
My plunge router base has a clip-on edge guide to keep it running straight. Once it’s set up right, it’s super easy to use.
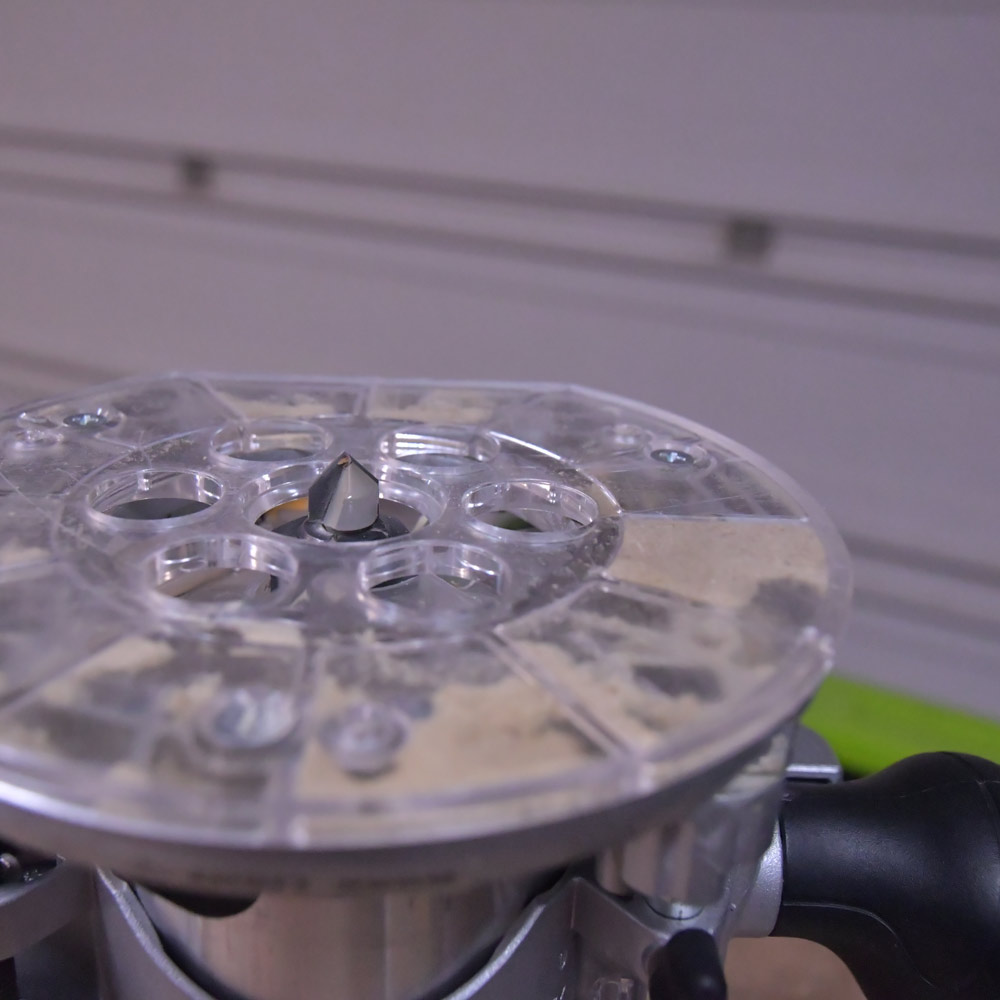
I wanted a failry deep cut, so I made it in two passes, increasing the depth for the second cut. The plunge router allowed me to drop into the board and start my cut several inches from the ends of the board that would be exposed against the doorways. I didn’t want to see the groove from the side.
Merrily Routing
The ends that butted into the walls didn’t matter so I ran the cut past my cut lines, effectively right out the end of the board.
It’s a really aggressively deep channel that (hopefully) will stand up to any vibrations in the house and keep flat stuff in place.

V-Groove Madness
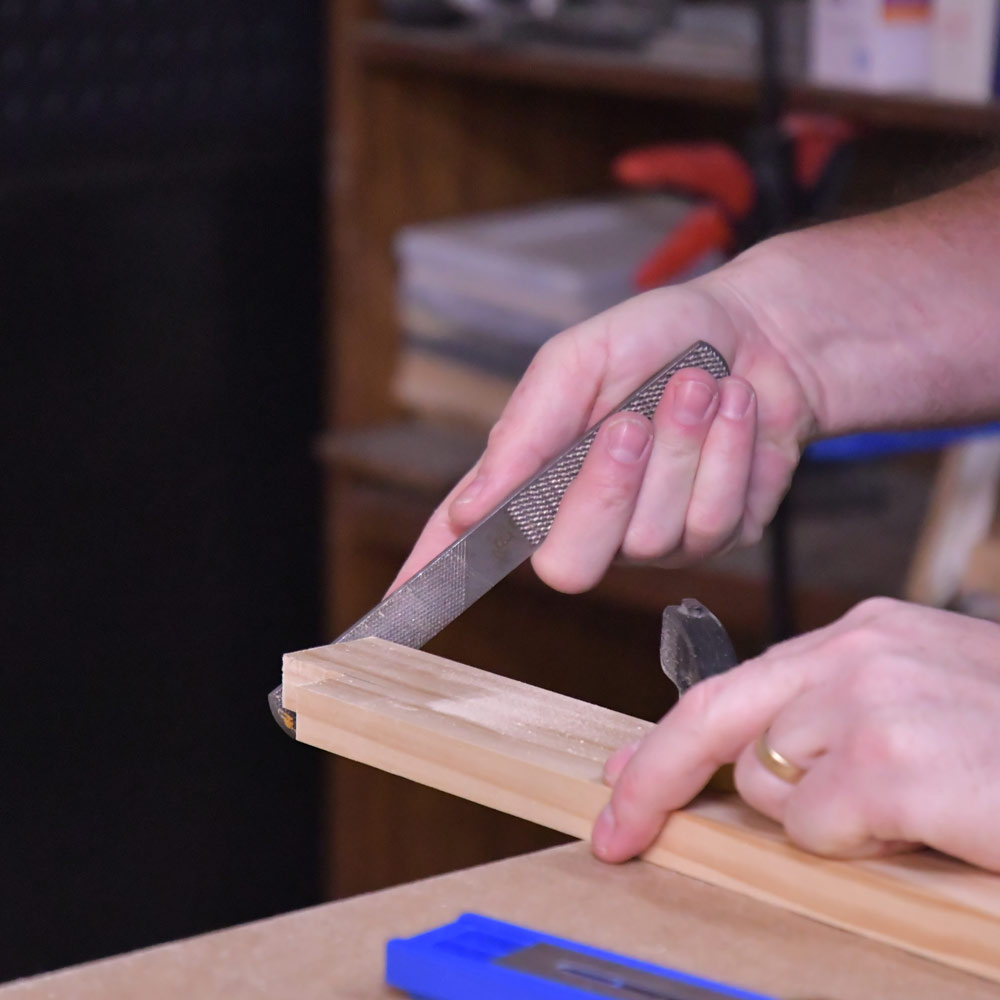
Rather than stop the shelves right at the edge of the doorway, I chose to end them halfway across the width of the vertical doorway trim. To accomplish this I marked the back side and trimmed a notch out with a couple cuts of the jigsaw. Basically, I removed the back corner.


To dress it up slightly and prevent the inevitable, sharp-corner induced head wounds I would surely suffer, I rounded the front corner slightly with a file and gave it a quick sanding.
I ran a bead of quality wood glue along the edge of the cap board and spread it evenly with my finger.

I clamped the new plate rail in place and fired some finish nails to lock in. It’s not going anywhere!

I was able to find 1 x 6 (base) and 1 x 4 (cap) boards long enough to span each of the walls in one piece. However, I could only find the 1x3’s for the plate rail 8 feet long. I had to extend them, and without a board stretcher, I had to add piece.
I drilled a pair pocket holes with my Kreg Jig Jr. in both ends of one piece. One end would attach at 90 degrees to the other plate rail at the corner joint, while the other end would be an end-to-end joint with the piece I was extending.

The Kreg Jr. is handy for long boards that would hit the ceiling with bigger pocket hole jigs.
I trimmed it to fit and glued it in place.

I made sure the boards were aligned perfectly when I clamped them; any variance would be extremely noticeable. A couple of screws in the pockets of each end and some wood glue ensured it’s not going anywhere.

You’ll never see that joint after filler, sanding, and paint.
Like the other boards, I finished it off with some nails from above.

I don’t exactly know what kind of knickknacks or artwork is going to eventually sit up on the plate rail when I’m done. Somehow, I don’t think I’m going to persevere in making a case to leave a gorgeous display of tools up there.

Strong enough to trust with my tools!
prepping for finish
Filling in the Nail Holes: Since I’d shot the assemblage smack full of nails and staples throughout construction, I had to spend some significant time filling the holes. I used the kind of filler that goes on pink and dies natural. I’d never tried it before, but liked how it indicated when it was dry enough to start sanding.
This is the kind of task you really need to listen to some music or a podcast. It’s tedious. I went over the whole project three times and still managed to miss a few nail holes. I’d been trigger-happy.

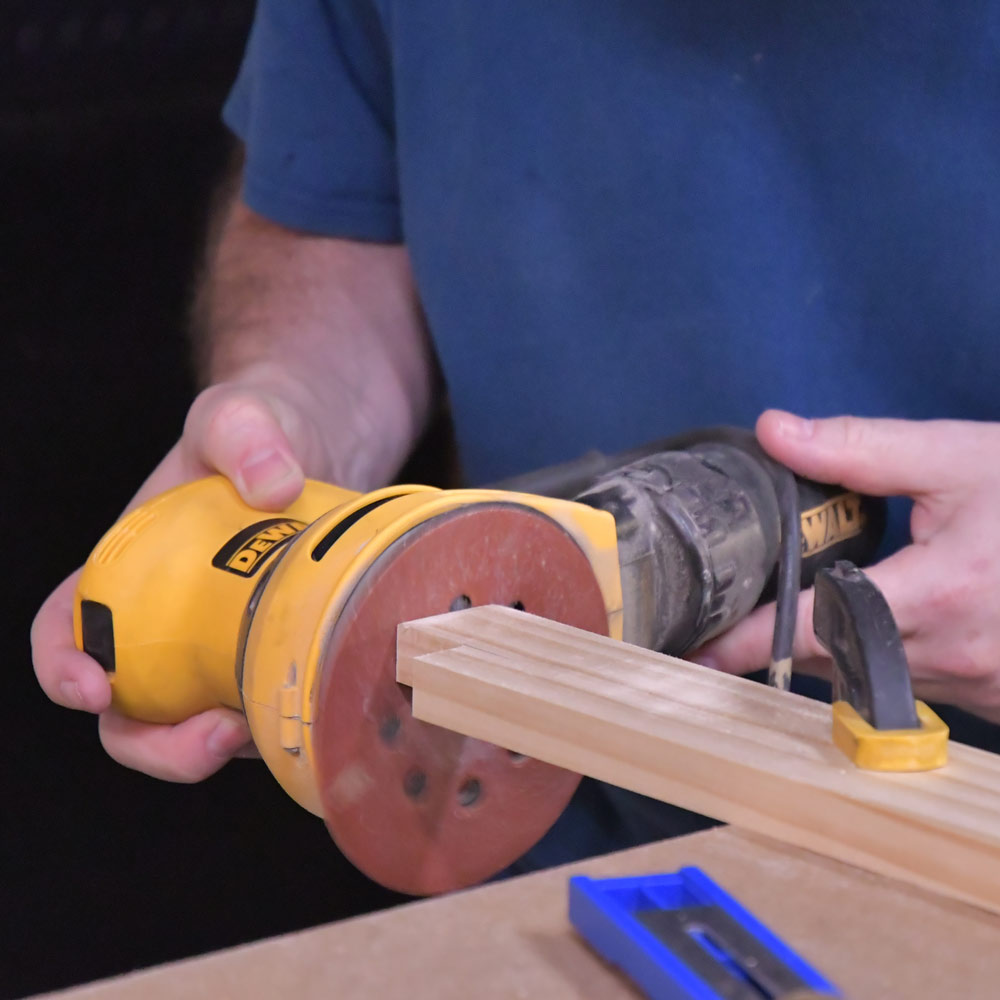
Sanding it Smooth: My awesome, new cordless sander arrived just in time for the next step. Although I had power available at shin-level of both walls, I really enjoyed the freedom of a cordless tool. Plus, I’m a certified a tool addict with an incurable, lifetime habit.

“Bzzzzzzzz…….”
The DeWalt cordless sander was awesome. I did the whole project and only used up 1/3 of the battery. In hindsight. I probably could have used my smaller, lighter 2 amp hour battery instead of the 5 amp hour that came with the tool. I managed to remove the shiny, new-tool look by getting it all dusty and battle-hardened on its very first project. It’s a veteran now.
I sanded down all the wood filler and gave the hardboard a light scuffing, just to make sure primer would adhere well.

Don’t Forget the Slapstick Comedy: I lost count of the times I hit my head on the ugly light fixture. Only once did I trigger the camera remote a second before I clipped it. You’re welcome.

Clean up the Dust: I vacuumed the area to get any sawdust the sander didn’t collect in it’s dust bag. I wiped the whole thing down with a rag, dampened in mineral spirits. I was careful to keep it lightly damp; I figured too much might swell the MDF.

Keeping my spirits up
Caulk the Seams: This project has a lot of seams. Miles of them. I recently found some awesome caulking tips from another blog friend, Alex of Old Town Home. Check out his great tips on his Instagram stories here: Instagram: Old Town Home - Calk Tips.
I replaced my caulk gun with a drip free (almost) one I found locally at Lowe’s. It was decent, much better than any of the shooters in my current arsenal, but it’s not one I’m going to put on my recommendations list. I’ll probably order the one that Alex recommends. I did follow his recommendation to spend a few bucks more on Big Stretch caulk.
So far, it’s way better than the cheapo stuff I’ve been using for years. I’m looking forward to it holding up with all these seams. The house is still going to move and settle.

It’s a bit tedious.
Not that I needed caulking practice, but I got a lot of it. Miles of it.
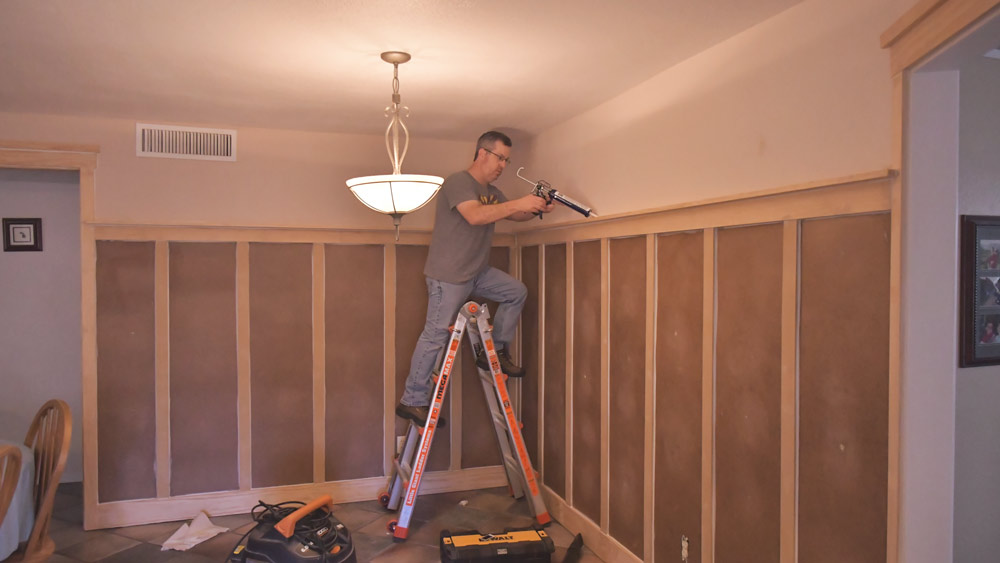
Shootin’ from the high ground
Primer: Primer was super important, especially on this project. Not only did I want to fill in any minor imperfections and ensure good paint adhesion, but the hardboard is much darker than the natural wood.
On top of those normal reasons to prime, MDF and HDF are notorious sponges. They thirstily slurp up any liquid, potentially swelling if you are not careful. I brush painted the edges, then rolled a very light coat of quality, blocking primer.

I picked up a new paint bucket too
I used a foam roller to avoid leaving brush strokes. It left a very slight, but nearly smooth texture.

The primer dried fast and left a thin skin, sealing the porous engineered-wood products for future coats.

This is some dark hardboard.
It would take a couple coats to block it out, especially with the chocolate-colored hardboard. It looked really blotchy after the first go.

Wear your paintin’ duds
After the second coat of primer, I started cutting in with a good-quality, enamel, semi-gloss paint. I wasn’t super careful on the edges because the walls are going to get painted in the future.
We’re probably going to use the same warm gray we used in the family room.
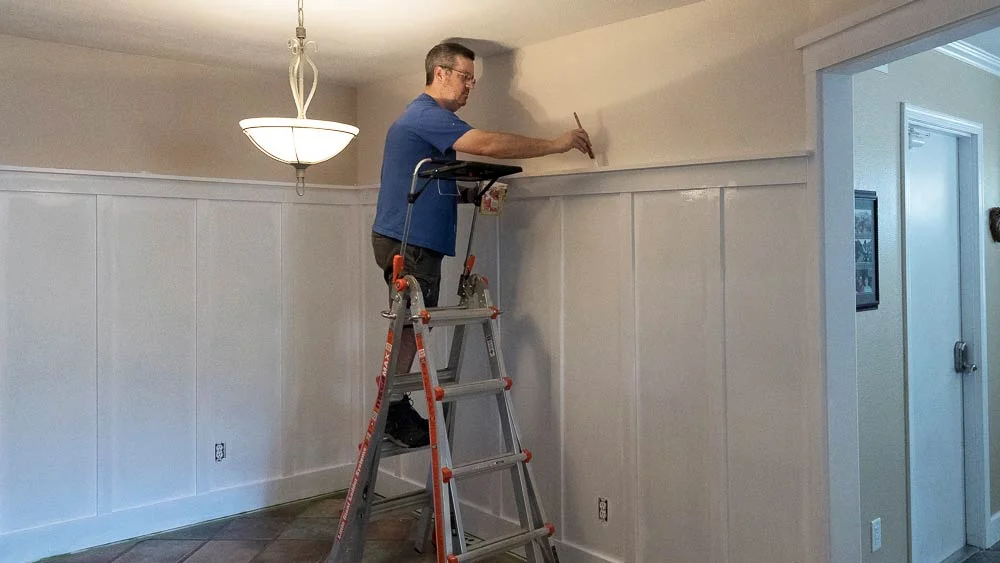
Yeah. That light is gonna go too.
The paint covered pretty good. I had some trouble with some drips and runs that I didn’t notice (until too late) and there’s still some very slight bleed through.
I have to do some touch-up, but I’m calling the project substantially done. It brightens the room and actually makes the ceiling look higher. I guess it’s like wearing vertical stripes, slimming.

Be careful, that paint is still wet!

We don’t even have any plates to display.
Here’s a closeup showing why I wanted to use the thinner, vertical material. Without getting too fancy, it adds some depth and design.

The batten at the cap.
The design is simple, but it looks complex, without getting to frilly.

The batten at the base
It’s still a little rough around the edges where I feathered the caulk out, but that will all disappear. when I repaint the walls. The whole project fits nicely with the craftsman style that’s been slowly spreading around this builder-basic, tract home. Character.

That one odd doorway, against the wall.
The dining room still has a way to go, but this project is the heart of it. We still need to fix the drips, paint the walls, replace the light and the receptacles, add a hutch or something on the left, and replace the table and chairs. I’d love to build the table, but I think I’d never get to it with my current project list.

I’m not going to slide the table back quite yet. I like eating dinner on the couch. Shhhhhhh…
Thanks for hanging out to the end. This is probably my biggest, single post ever. Do you like the mega-post style, or should I break these up into a couple parts?
DIY blogging is such an amazing community. Everyone can find tips and tricks from others. I read several posts and watched a few videos before ultimately coming up with my own approach to fit our home, my available tools, and my skills. Check out the two I referenced in this post and give them a follow on their social channels Ugly Ducking House and Old Town Home. You won’t regret it.
