
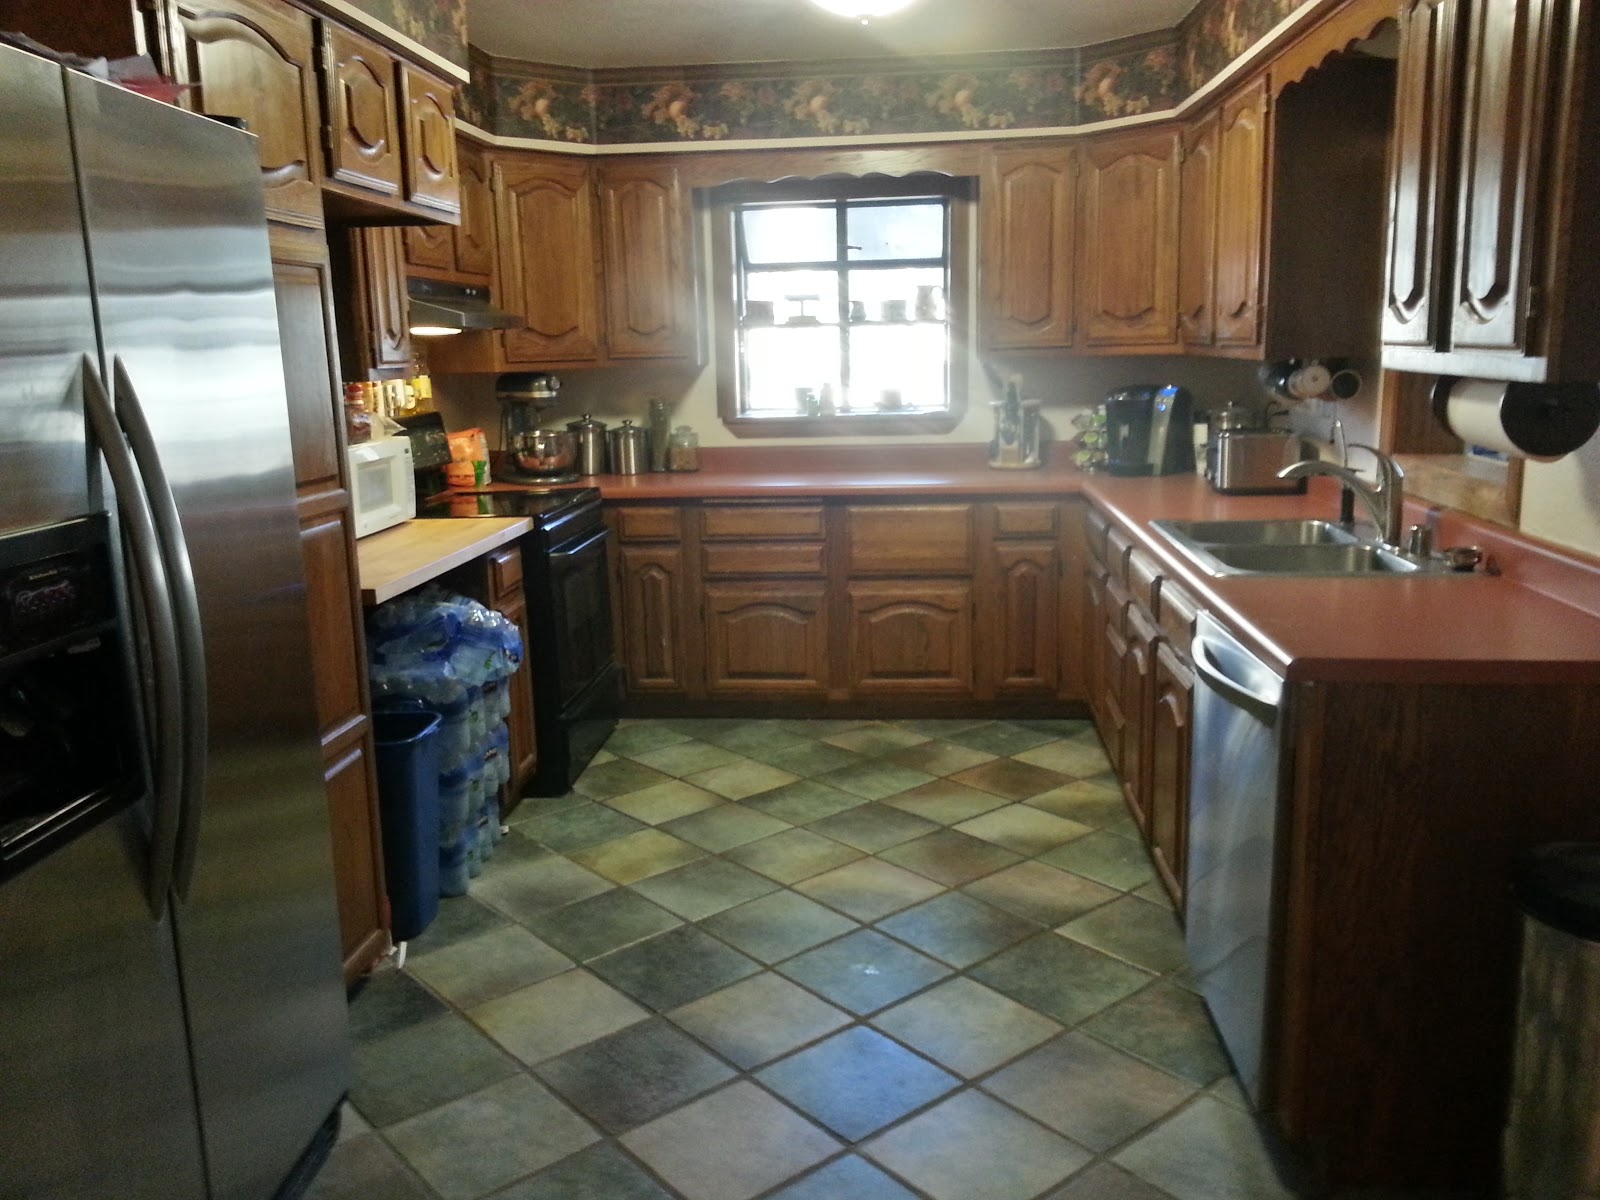
Kitchen Remodel: Episode 1 We've got the ugliest, U-shaped 1970's kitchen. It's gotta go at some point. What are we gonna do?
Read MoreThe cave.

The cave.
Kitchen Remodel: Episode 1 We've got the ugliest, U-shaped 1970's kitchen. It's gotta go at some point. What are we gonna do?
Read More


 In cleaning up the garage after a couple weeks of heavy-duty weekend-warriorsmanship, I decided I'm not using my storage well enough. I'm having difficulty getting everything put away without heaping it up. There's two sets of double wall cabinets that I picked up on clearance about four years ago. They're cheap pressboard, but they're serviceable and seem to be holding up fine.
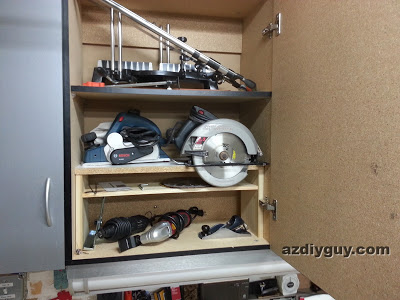

 |
| The routers are upside down to protect the bits that are set juuuuuuust right. |

In the normal course of working on this blog, building readership, I did a search to see how it was showing up on Google. I searched some terms that were fairly unique, like "...too busy kicking old house ass..." before searching "AZ DIY Guy's Projects". I found this odd little link at the bottom of page one:

Fine Woodworking Plans?
Weird. It clearly referred to my General Tools EZ Pocket Hole Jig review post. Then the next phrase isn't mine. Huh? I thought I'd follow whoever shared my post and kindly ask them for a proper back-link. Here's where it went:

Huh? (Again). I kind of remember something about this from about a year ago. I checked around. Sure enough, this is the scam that Steve Ramsey of Woodworking for Mere Mortals posted several times about. Here's links to a few of the good ones: April 2, 2012, April 7, 2012, April 10, 2012.
Basically this site appears to be a shady affiliate in the Ted's Woodworking pyramid scheme of selling woodworking plans that have stolen from magazines and reputable sites around the web. There's tons of info out there on this huckster syndicate if you want to look for it, and can wade through all the paid advertising with fake reviews. I'm surprised they are still going, but these shadow scam things are hard to stamp out. I've researched a similar tactic from the Build Your Own Solar Panels for your Home scam in the past. It's all crap.
I even followed some comment links and found good old "Ted" AKA "man with gray hair smiling" at iStock Photo. Yep, good old "Ted" himself is a $29 image from a stock photo house.

Screen capture of iStock Photo
I wonder how the guy who sold his mug to a stock photo house feels about the way it is being used. The poor schlep is likely to be recognized on the street by an angry, wronged woodworker and get socked, unsuspecting in the jaw.
I'm not posting clickable links to this garbage. I don't want to give it any sort direct traffic. Here's where it gets me: how the heck did they embed my story title and text into a Google search?
I searched around a bit and, as near as I can tell, it's coming from paid, automated software that "legally steals" or "ethically steals" back link traffic. What the hell is that? Programmers create this stuff. People behind the sites sell and operate it. Bastards all.
Selling someone's plans without permission or plagiarizing their written word's in an effort to misdirect / or trick the web surfing public into a scam site that sells the stolen plans is stealing. It is unethical. Legal or not, if you take part in this, you are a scumbag, period. You are making money on the art created by the talents of others, without their permission, and from what I understand against their express statements denying permission.
So far, I've only been slightly wronged, maybe a tiny bit of misdirected traffic. I'm angry anyway. This site is barely two months old. Others are probably suffering actual damage. Plus, the artists that created plans that have been stolen have certainly been wronged. Please don't support it by buying this garbage. Do your research. Wait until you hear about the actual product you will receive.
OFFICIAL PROCLAMATION:
I hereby prohibit any of my created works, images, text or media of any kind from being utilized in any form to support the sale of Ted's Woodworking products.
Disclaimer:
This post is written with the research I was able to do on the web. I trust the sources I found, supporting my conclusion, as good and upstanding, and have no reason to doubt their claims. If I am wrong in my belief that the Ted's Woodworking Plans operation is a filthy, scamming, operation of thieving jack-ass-dom, I will remove this post and offer sincere apologies, without crossed fingers, once I see proof otherwise. I invite the scumbags to contact me, since they cannot be contacted directly to inquire.
Back to sunshine, rainbows, and happy projects next time, my friends. Promise.
The front door. Someone actually did this to their own home,... on purpose!
Remodeling a house and finding the half-assery left by previous, drunken DIY'ers.
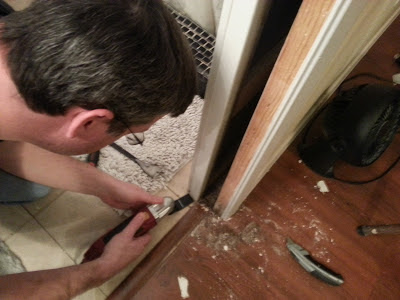
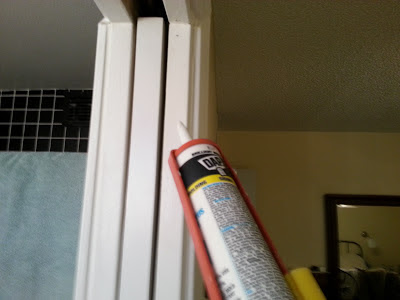
Read MoreI'm replacing all the old, flat panel hollow-core doors in the house with beautiful 6-panel doors. Here's how I installed the new door in the guest bathroom.
Read MoreHaving successfully wrapped up the first of our interior door replacements last weekend with the
, I'm moving forward with the project. The rest of the doors are standard hinged style. The next one to tackle is the guest (
kids
) bathroom. It's one of the most visible in the house, we'll enjoy it being complete.
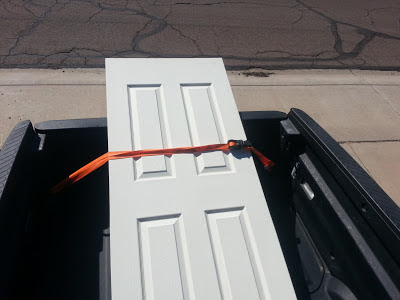
Pre-Primed, and too big
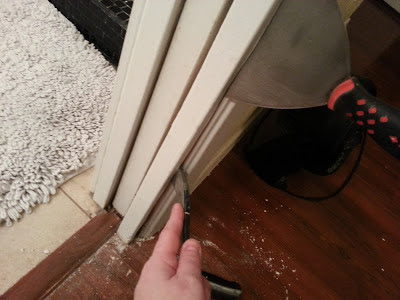
Rather than the more efficient, prefab / assembly line approach of buying all the doors, trimming all the doors, painting all the doors, etc. all at once, we're going with the slower, easier on the cash-flow approach of doing one door at a time. I suppose a benefit is that I don't have to stage doors all over the place as paint dries. Plus, we get to see some finished work a little sooner. The drawbacks are the repeated shop cleaning between each door's planing and painting as well as the wait time between paint coats.

I bought another six-panel door at Home Depot this morning. I also picked up a new brushed nickel, lever-style "door knob" (
What do you call it if it's not a "knob" anyway? The packaging doesn't even say
.) and a bulk pack of matching brushed nickel hinges. By buying the bulk pack of 12 hinges, I saved over ten bucks vs. buying them individually.

Buying in bulk!
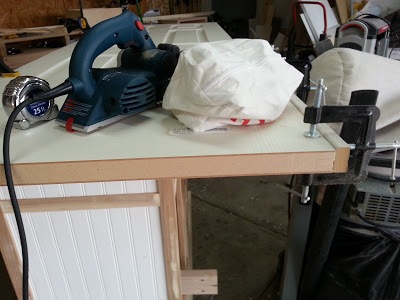
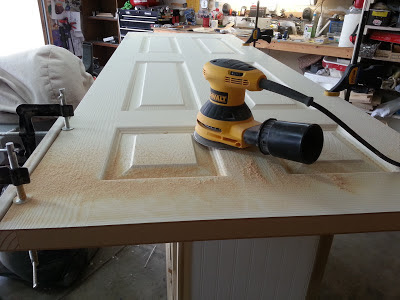
Back at home, prepping this door was exactly the same as prepping the pocket door. Only this time I managed to screw up the edge planing of the first side. I sort-of tapered the door somehow; it was 1/16" off at one end. I must have twisted the depth knob when I was interrupted by a little girl offering to keep me company in the garage,... if I'd fix her a bowl of cookies 'n cream, ice cream. It took a bit of tweaking to get it squared up again.
I really like the Bosch planer . It took a bit of practice, but I have the hang of it now. The only struggle I have is the necessity to walk while cutting the long edge. Sometimes I get a little bobble in the cut. I ended up doing a shuffle / shimmy / slide / step-behind maneuver. It would probably be better to set the door on edge. I'll try that next time.
Grab your popcorn folks! Here's the world premier movie of AZ DIY Guy in action. I'm really much better looking in person, this particular role required a dusting of grey hair at the temple and an out of shape appearance. I think I pulled it off. It's certainly Oscar worthy.
There's a dust storm rolling in! Hold your breath and cover your eyes!
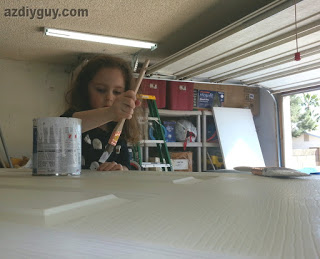
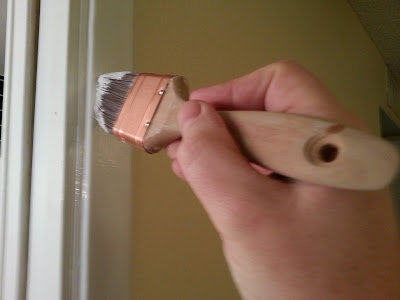
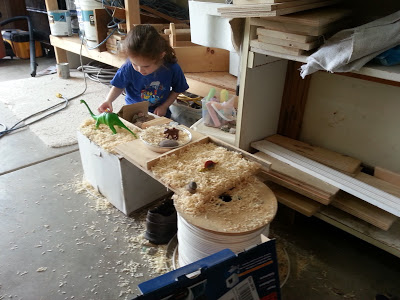
Gracie's been bugging me for a week to help with the painting, so I let her have a go of it. She did pretty good,... mostly. I had to keep reminding her not to scrub (destroy) the brush and tried to keep the splatter to a minimum. I lightly, quickly brushed over her work to keep the strokes with the wood grain. Despite the exuberant assistance, It turned out pretty well.
The paint dried fast in today's 78º, dry weather. I need to put one more coat on in the morning. Hopefully, I can get it done tomorrow.
<UPDATE>
Up before 6am Sunday morning, while the family slept, I put a coat of fresh paint on the reverse side of the door. I ran out of paint right at the finish line, dang-it. I scraped that can as clean as Gracie's bowl on a spaghetti night. I need to go grab some paint first thing and finish if there's any hope of installing it today.

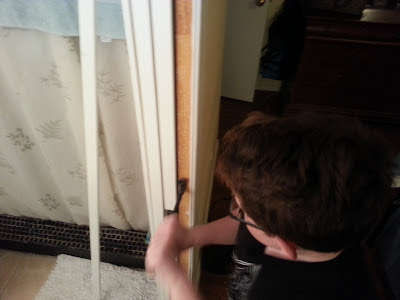
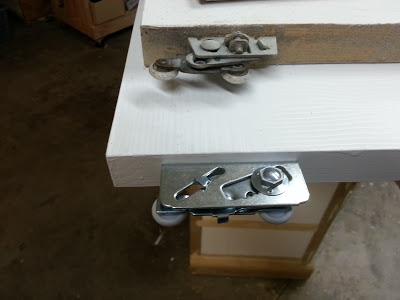
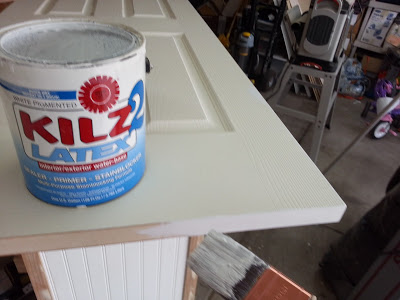
 I'm installing the new pocket door for the master bath today. I'd already prepared our new six-panel door, trimmed it to fit, primed the fresh edges, and painted the whole thing with a couple coats of white, semi-gloss last weekend. If you missed the story, find it here; it's a cliffhanger. The last coat of paint went on 6 days ago, so it's nice and dry, out in the workshop.
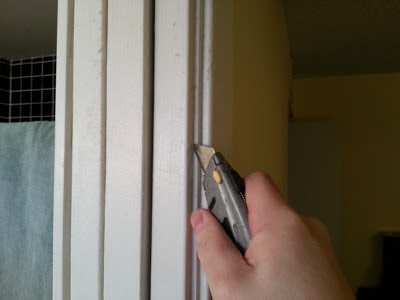
 |
| Child Labor Rocks !!! |


 |
| Like most men, I have a one-track mind. |


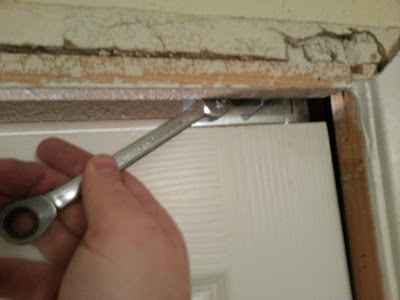
Turn the brain back on,.. climb back up the step stool,... crank the wheels back up,... climb down the step stool,... swing the door out,... climb back up the step stool,... extend the rollers again,...

 |
| What do you think? Better? |
 |
| Notice my work bench? Yep, that's the (still) unfinished hall organizer project. |


 |
| blurry picture / blurry brain |
 |
| The blue versus orange smack down. |
 |
| I think we're going to go a with satin nickel lever style |
 |
| No the sander was not used on this project, but the pliers were! So it's a messy workbench. |
 |
| Another decade of projects on the way. |
 |
| I could almost feel the heft of this beast loaded with 7 varieties of washers, before it was torn ruthlessly from my grasp. |
 |
| The Wee-Pirate and her loot. |
This is the final episode of the Great Family Room Remodel, the last five full days of work. The electrical trim, crown molding and baseboards get wrapped up.
Spoiler Alert! If you've stumbled into the mess without first reading the exciting beginning of the saga, head over to the beginning at The Great Family Room Remodel - Part I
Workday 15:
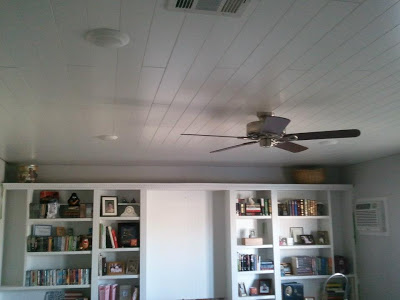
Electrical Switching is done and the can lights are lit!

I'm really excited about these dimmable L.E.D. fixtures. The light is decently warm at 3000k, much better than the CFLs I've seen. Each puts out the equivalent of a 75 watt incandescent at only 14.5 watts. They dim to 5%. We have more than twice the light of the old twin 60w ceiling fan for less than half the energy. It's spaced more evenly around the room. Plus, they generate less heat, which reduces the A/C load. They supposedly last 32 years. Commercial Electric T91: $39 each at Home Depot. They take about a minute to install in a standard can, including opening the box and climbing the ladder.

t took a bit of fiddling around to get the dimming to work. Dimmer switches specifically for LED fixtures didn't work. I ended up going to their website and figuring out which standard dimmer to use.
The three gang switch box includes a dimmable toggle switch, a speed control switch for a ceiling fan, and a standard toggle switch that controls a receptacle hidden above the bookshelves for Christmas lights or perhaps a string of future LED rope light for ambient lighting.
Workday 16:
I put up the ceiling fan, which is pretty much a must-do for every room in the house when you're in Phoenix. We chose one without the light kit this time since the cans do so well. We gained a lot more vertical space in the room. This will be much more comfortable on the old noggin when I'm jumping around like a fool with the kids, playing with the Xbox Kinect.
Rather than more white on white, we went with a brushed nickel with dark wood blades. We may change the blades in the future, but we like the way it looks now.
We pulled down the plastic sheeting protecting the bookcases. Aaaaaaghhhh. Everything was coated with drywall dust. Jennifer & I spent the rest of our work time cleaning everything up. I'm still going to do some work on the shelves to make them a bit more usable later.
Workdays 17 & 18:
80' of crown molding in 16' lengths loaded with less than 5 feet of bed space.

Putting up the crown molding was slow going since I hadn't done it before. We chose a simple, clean profile since there is so much detail on the dentil molding and the bead board in the room. We thought it would look too busy.
This is Trimfinity Crown Molding from Home Depot. It's is made from 90% recycled plastic (50% post-consumer, 40% pre-consumer). Mostly polystyrene. It's economical
too, much cheaper than wood and a bit less than MDF (which chips too easy IMHO).
After fighting the 16' lengths home, I decided to only put it up about 4-5' at a time. It's just too floppy to work with a long stick and make it look good, by myself. It cuts , nails, and takes paint like wood. I can hide the scarf joints pretty good.
<update - I wouldn't do this again in the future. Too many joints across the room, in four months, about half of them have opened up and need to be caulked. I'll have help next time instead of stubbornly doing it alone>
I'm using the method (from Tom Silva of This Old House) where I butt a stick to the wall and back cope one mitered cut rather than a dual-mitered corner that will open up later.
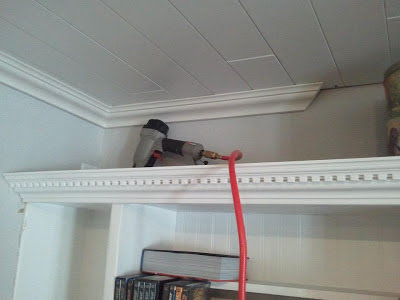
Note the gap at the wall and the face screwing at the edge, hidden by the crown.
Workdays 19 & 20:
Final details. We decided on a 6" tall, simple profile base molding. It seems to go with our somewhat classic look to the room. It was a bit tricky to place because the floor was so wavy. When I installed the first piece using a level, with the highest point touching the floor, I had a 2" gap by the edge. It had to be torn out. I ended up warping the molding to keep it somewhat uniform in it's distance from th
e floor. It looks good to the eye. Once again, I wish our predecessors had originally put a flat floor in. No way we can afford to tear it out and re-do it now.

I decided I really do prefer the green Frog Tape for masking. It leaves a much crisper paint edge than anything else I've tried. There was a lot of hating on their FB site, but it sure worked well for me, on pretty fresh paint, with no issues. It worked equally well edging the crown molding. Those are my cheap computer speakers on the left. I use them with an iPod or the Kindle Fire (as show in the awesome Dodo case) to play music while I work.
That's pretty much it for the project. Just a final clean-up and moving back in. We need some new furniture to get it right. I'll do a final reveal when it's all set.
The budget was about 10 - 20% high, but I really blew the timeline. 5 workdays turned into twenty, plus several evenings during the workweeks. We're really pleased with the results. I'll check back in with more updates as more tweaks get accomplished.
And the next major project is... ?
After tragedy, travel, family illness, and getting back to work, it was tough to get rolling on the project again.
Spoiler Alert!
If you've stumbled into the mess without first reading the exciting beginning of the saga, head over to the beginning at
The Great Family Room Remodel - Part I
As I have been recounting The Great Family Room Remodel story on this site, I've known this chapter was coming and planned on glossing over a big gap in the progress due to family tragedy, as I had originally done on my Facebook posts. I like to keep my stuff light, somewhat humorous, and not too personal. Now, months later, I feel it's an integral part of the story and I should share it; it's reality of life. Life has a way of getting in the middle of projects. Plans get derailed.

Jef: 12/21/1971 - 05/09/2012
May 9, 2012, my youngest brother Jim called me at work, from Michigan, to tell me that our other (middle) brother Jef had been taken to the hospital with some sort of heart trouble, and was in intensive care. Jim was far from the hospital, but on his way, and would call me back when he got there. His next call, an hour later, was the absolute worst news; Jef had died. He was 39. Jim, his wife, and Jef's wife were in really rough shape at the hospital. I had to tell our parents, via telephone, that their son had passed. That memory will haunt me forever. I was, and remain, crushed and heartbroken. I'd never lost anyone close to me in my entire life. We left that night, on the red-eye flight, for Michigan.
The next days were a blur. Visitations, the funeral, and family visits were an overwhelming crush of emotions. We got back home, exhausted, roughly a week later. My poor wife was severely sick. I had no steam left, or interest to working on projects. The house remained a wreck.
Jef was a truly good man and I miss him terribly. He left a beautiful family, his wife and three very young children. The amount of friends and people he had touched in his life was simply staggering. At the time, we had no idea what had caused his young heart to stop working. Now we have an idea, a belief. I'm not sharing specifics at this time. However, my personal decision and advice, based on my belief, is to stay away from energy drinks,
especially the popular shot-size energy supplement drinks
. I'd boycott stores that sell it, but there don't seem to be options for stores that don't. I've blocked them from advertising on my site.

Jef's family, May 2012, in Florida, on vacation.
Before we returned, Jef's wife encouraged me to get back to work on the family room. She said she and Jef had been following my Facebook posts, and enjoying the progress. He'd want me to get back at it.
Throughout the summer, a group of Jef's friends, still close since childhood and high school, my brother, parents and I set up a trust fund for the future education of his children. This will be an ongoing project for years.
Hug your spouse and your kids.
Workdays 13 & 14:
After tragedy, travel, family illness, and getting back to work, it was tough to get rolling on the project again. My heart just wasn't in it. But once I got started, it was really great to be using the tools, making sawdust, and blasting the iPod. Mr. Nugent may be a bit of a nut lately, but some of
sure gave me a boost in production. All the planks are up and it looks great.
The last row was a bear to slip in place, getting the tongue and groove together without too much gap at the wall. I also had a devil of a time with dark fingerprints this time for some reason (easily cleaned with Costco baby wipes). I still can't believe how well it worked out; in all the cuts for length, edging, can lights, A/C, and the fan, I only screwed up once and cut a board backward; measure 3 times and cut once.
By over ordering by 10%, just in case, I have a box and a half of spare planks to put in the attic, in hopes that I'll never need to make a repair. If we didn't have them, certainly the roof would be leaking by tomorrow and we'd find this particular plank out of production.
Of course there's still lots of work to do, but the end is in sight. We're ready to stop living like cave people in the dining room.
The Weekend Warrior is back. After a getting back to work for a week, we get back in action on the weekend. Real progress continues with more framing, insulating, and the actual installation of the ceiling planks gets underway.
Spoiler Alert!
If you've stumbled into the mess without first reading the exciting prequels to the saga, head over and start from the beginning at

All tucked in.
Workday 11:
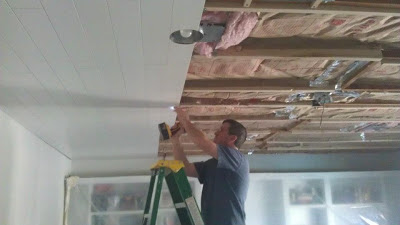
Saturday: I managed to finish the framing at the sloped edges of the room to allow for end fastening of the planks. I had to rip some 2x4's on the table saw for the width of the room and create a bunch of short brackets to hold them. A slow process, since no two framing members were alike up there. I managed to get them up and finished insulating and taping the ceiling by the end of the day. Once again, the DeWalt Chalkline Laser Level was invaluable for getting everything level.
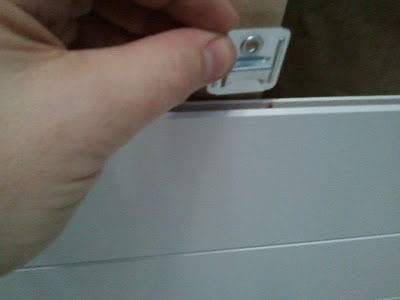
A close up of the clip for the groove on the planks.
Workday 12:
Sunday:
Finally,
the ceiling planks are going up. It's a neat system. It took a bit to do the math, rip, and fasten the first edge piece, by face screwing the edge into the framing.
Once that was done, the planks started slipping in quickly. It's all tongue and groove with a screw-in clip for each rafter.
I launched a bunch of those screws around the room throughout the day, before finally realizing I needed a #1 Phillips driver bit instead of the standard #2. I used my impact driver to drive the screws which really sped things up and was lighter than lugging the full size drill overhead all day.
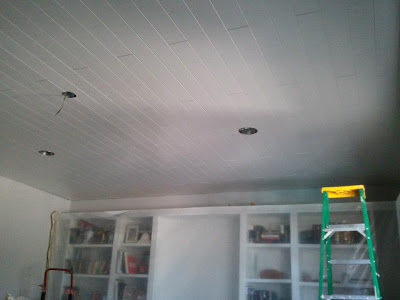
It's starting to look like a finished project!
The can lights and vents slowed me down a bit, due to all the cutting with a jigsaw. Masking tape on the shoe of the jigsaw kept me from scratching the finish. I had to make cuts on three to four planks for each can light because the openings were wider than the planks. I used a paper template that came with the cans. By the end of the day, four cases were installed, about 1/3 of the room. The room already looks better and is holding temperature nicely.
I really like the plank system. As I mentioned in Part I, they are Woodhaven 1148B Ceiling Planks by
Armstrong Residential Ceilings 5" wide x 84" long x 3/8" thick. They are an engineered board, like hardboard with a smooth, white painted finish.
We ordered them online through Lowe's and picked them up at their local home center.
It's a good looking system. You take the cut end from a finished row and start the next row with it. This way the plank seams are nicely staggered, creating a diagonal pattern.
Next, I'm derailed by family tragedy, but return with: The Great Family Room Remodel Part VI


 |
| Good night sweet prince. May you dream of large boards. |
 |
| Finally: A good comparison of photography with a DSLR camera instead of a camera phone. |
 |
| This sucks! |
 |
| You don't know jack! |
 |
| Looks like a snap. |
 |
| On your mark, get set... |
 |
| Pop out these thing-a-ma-jigs. |
 Nothing broken! I got one of those early bursts of confidence, you get when nothing goes wrong early in a project. Dangerous.
  I gently pulled the jack forward and fed a little of the slack cable through the opening. There was enough to twist and rotate the assembly so I could get a good eyeball on it. There wasn't even a clip on the little green plug for me to break! I grabbed the plug and the jack assembly and slowly pulled / wiggled it apart. Bingo! No problems so far. The plug popped into the new jack and the jack snapped into the dash. I clipped the plunger / piston onto the glove box, reinstalled the two bumper things, removed them both when I realized I needed to semi-close the box first, reinstalled them again, and, using the most difficult technique of the day, flipped the box closed. That was easy, too easy, waaaaay too easy...
 I stopped the timer. Barely over 2 minutes, TOTAL, from opening the glove box.
  |
| Get up, Everybody's gonna move their feet, Get down Everybody's gonna leave their seat You gotta lose your mind in Detroit Rock City |
 |
| That's not a Princess Leia hairdo, honest! |
 |
| "Nah - Nah! I'm not listening to Daddy!" |
 |
| "Still not listening!!!" |
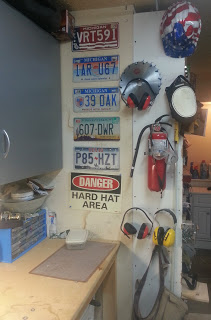 |
| There's several stories here. |
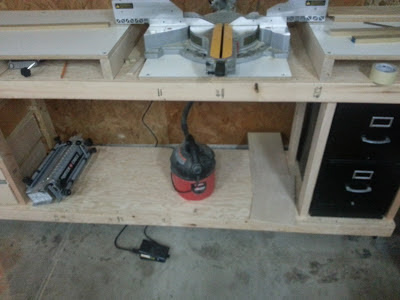
This is my easy-to-build, miter saw work bench made from 2x4's. It's a big beast!
Read More


